For individuals looking to reduce energy costs, decrease their carbon footprint, and gain energy independence, do-it-yourself (DIY) solar systems have become an increasingly popular option. The availability of affordable solar components from Chinese manufacturers, factories, and suppliers has made DIY solar projects feasible for a broader audience. This article will delve into the steps involved in building a 400-watt DIY solar system, including component selection, system design, installation, and safety considerations.
Understanding DIY Solar Systems
A DIY solar system refers to a project where an individual designs, assembles, and installs a solar power system themselves, rather than relying on professional solar installers. The DIY approach allows individuals to save on labor costs, gain a deeper understanding of solar technology, and customize the system to their specific needs.
Advantages of a 400-Watt Solar System
A 400-watt solar system offers a range of benefits for both residential and non-residential applications, making it an excellent choice for individuals looking to harness solar power. Some key advantages include:
- Cost-effectiveness: A 400-watt solar system is relatively inexpensive compared to larger capacity systems, making it a suitable option for individuals with limited budgets.
- Versatility: 400-watt solar systems can be used for various applications, such as powering small residences, RVs, boats, and off-grid cabins.
- Ease of installation: The compact size of a 400-watt solar system makes it easier for individuals to install, reducing labor costs.
- Environmental impact: By utilizing clean and renewable energy, a 400-watt solar system helps reduce carbon footprint and promotes a more sustainable lifestyle.
Component Selection
A typical 400-watt solar system consists of several key components that work together to capture, convert, and store solar energy. These components include:
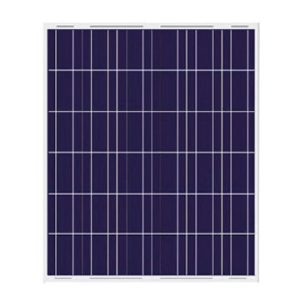
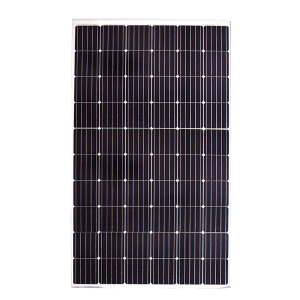
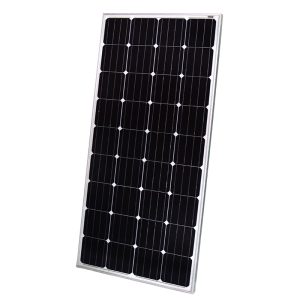
- Solar panels: Solar panels are the heart of the system, responsible for converting sunlight into electrical energy. For a 400-watt system, you’ll need either two 200-watt solar panels or four 100-watt panels. Brands like JinkoSolar, Trina Solar, and LONGi Solar are known for their reliable and efficient solar modules67.
- Charge controller: A charge controller regulates the current flowing to the battery, preventing overcharging and ensuring optimal battery life. You can choose between Pulse Width Modulation (PWM) controllers or Maximum Power Point Tracking (MPPT) controllers, with MPPT controllers being more efficient but costlier.
- Inverter: An inverter converts the direct current (DC) electricity produced by the solar panels into alternating current (AC) electricity used by household appliances. When selecting an inverter, you must consider the total wattage of your system and peak load requirements.
- Batteries: Batteries store excess energy generated by the solar panels for use when sunlight is not available. Deep-cycle lead-acid batteries or lithium-ion batteries are commonly used for solar systems. Lithium-ion batteries are more expensive but offer higher efficiency and longer lifespan.
- Mounting hardware: Mounting hardware includes the brackets, racks, and wires needed to mount the solar panels, connect the components, and wire the system. It’s important to choose durable and weather-resistant mounting hardware to ensure long-term reliability of the system.
System Design
After selecting the components, the next step is to design the solar system. This involves determining the optimal placement of solar panels, sizing the battery bank, and selecting the appropriate inverter capacity.
- Solar panel placement: Solar panels should be placed in a location with direct sunlight and minimal shading to maximize energy output. Resources suggest that in the Northern Hemisphere, solar panels should face south for optimal performance4.
- Battery bank sizing: The size of your battery bank depends on your energy needs and desired backup time. Consider your daily energy consumption and the number of cloudy days when determining battery bank size.
- Inverter capacity: The inverter’s capacity should be sufficient to handle the peak load of all devices you plan to run simultaneously. Add up the wattage of all appliances you intend to use at the same time to determine the required inverter size.
Installation
Installing a solar system requires some electrical knowledge and DIY skills. If you’re unsure about any aspect of the installation process, consult a qualified electrician.
- Mounting solar panels: Securely attach the solar panels to your roof or ground mount using the provided mounting hardware. Ensure the panels are tilted at the correct angle to maximize sun exposure.
- Wiring: Connect the solar panels, charge controller, inverter, and batteries according to the wiring diagram provided by the manufacturer. Use appropriately sized wires and connectors to ensure safe and efficient current flow.
- Grounding: Properly grounding your solar system is crucial to prevent electric shock and ensure safe operation. Consult a qualified electrician to ensure proper grounding.
- Testing: After installation, conduct a test run to verify that all components are functioning correctly. Check the voltage and current output of the solar panels and ensure the inverter is properly converting DC to AC power.
Safety Considerations
Safety is paramount when installing and operating a solar system. To ensure your safety and prevent any accidents, follow these safety precautions:
- Disconnect power: Always disconnect the power to the system before handling any electrical components.
- Use personal protective equipment: Wear gloves, safety glasses, and insulated shoes during the installation process to protect yourself from electric shock and injury.
- Handle batteries with care: Batteries contain corrosive chemicals and should be handled with caution. Avoid contact with skin and eyes.
- Avoid extreme temperatures: Extreme temperatures can affect the performance of solar panels and batteries. Install and operate the system within suitable temperature ranges.
- Regular inspections: Periodically inspect your solar system for any signs of damage, corrosion, or loose connections. Regular maintenance helps ensure safe and efficient operation of the system8.
Manufacturers, Factories, and Suppliers from China
China has emerged as a global leader in solar component manufacturing. There are numerous reputable Chinese companies offering high-quality and affordable solar panels, inverters, batteries, and other solar system components. When sourcing components from Chinese suppliers, it’s important to consider the following factors:
- Reputation: Look for suppliers with a good track record and positive customer reviews.
- Quality: Ensure the components meet industry standards and have necessary certifications.
- Price: Compare prices from different suppliers to find the best deal.
- Warranty: Choose suppliers that offer comprehensive warranties to cover any defects or issues.
- Customer support: Select suppliers that provide reliable customer support to assist with any problems that may arise.
Some of the top Chinese solar panel manufacturers include:
- JinkoSolar: Based in Shanghai, JinkoSolar is a leading global solar module manufacturer known for its high-efficiency panels and innovative technology.
- Trina Solar: Headquartered in Changzhou, Trina Solar is a major player in the solar industry, offering a wide range of solar products and integrated photovoltaic services.
- LONGi Solar: LONGi Solar, based in Xi’an, is the world’s largest manufacturer of monocrystalline wafers and a major developer of solar projects.
- JA Solar: JA Solar, located in Shanghai, is a well-established manufacturer of high-performance solar cells and modules.
- Yingli Solar: Based in Baoding, Yingli Solar is one of the world’s largest solar panel manufacturers, known for its quality products and global presence.
These manufacturers offer a wide range of solar panels suitable for DIY 400-watt systems, including monocrystalline and polycrystalline options with varying efficiencies and price points.
Conclusion
Building a DIY 400-watt solar system is a viable option for individuals looking to reduce energy costs, decrease their carbon footprint, and gain energy independence. By carefully selecting components, designing the system, and following safety precautions, you can create a reliable and efficient solar system that meets your energy needs. The availability of affordable solar components from Chinese manufacturers, factories, and suppliers has made DIY solar projects more accessible than ever before. By harnessing solar power, you can embark on a journey towards sustainable living while contributing to a greener future.
As you embark on your DIY solar project, remember to thoroughly research each component, compare options from different manufacturers, and prioritize safety throughout the installation process. With proper planning and execution, your 400-watt solar system can provide years of clean, renewable energy, reducing your reliance on the grid and lowering your overall energy costs.
By leveraging the expertise and manufacturing capabilities of Chinese solar companies, you can access high-quality components at competitive prices, making your DIY solar project more cost-effective. However, it’s crucial to balance cost considerations with quality and reliability to ensure the long-term success of your solar system.
As solar technology continues to advance and become more accessible, DIY solar projects like the 400-watt system described in this article will play an increasingly important role in the global transition to renewable energy. By taking the initiative to build your own solar system, you’re not only benefiting from clean energy but also gaining valuable knowledge and skills that contribute to a more sustainable future.


